チュートリアル(Basic)
目次
- 1. 概要
- 2. シーン作成
- 3. 移動する
- 4. 音を鳴らす
- 5. LED を発光する
- 6. toio IDの読み取り(Position ID & Standard ID)
- 7. センサーのイベントを検知
- 8. 複数のキューブを動かす
- 9. CubeManagerクラスを用いたソースコードの簡略化
- 10. 途中接続/途中切断
1. 概要
本 SDK は同じソースコードで、シミュレータ環境とスマートデバイス環境の両方で toio™コア キューブ (以降キューブ) を動かすことが出来ます。 以下の説明は、シミュレータ環境での動作を前提として説明します。
また、Visual Scriptingを利用する場合、本チュートリアルと並行して適宜【コチラ】も目を通すことをお勧めします。
2. シーン作成
※ この章のサンプルファイルは、「Assets/toio-sdk/Tutorials/1.Basic/0.BasicScene/」 にあります。
※ この章のウェブアプリサンプルは【コチラ】です。
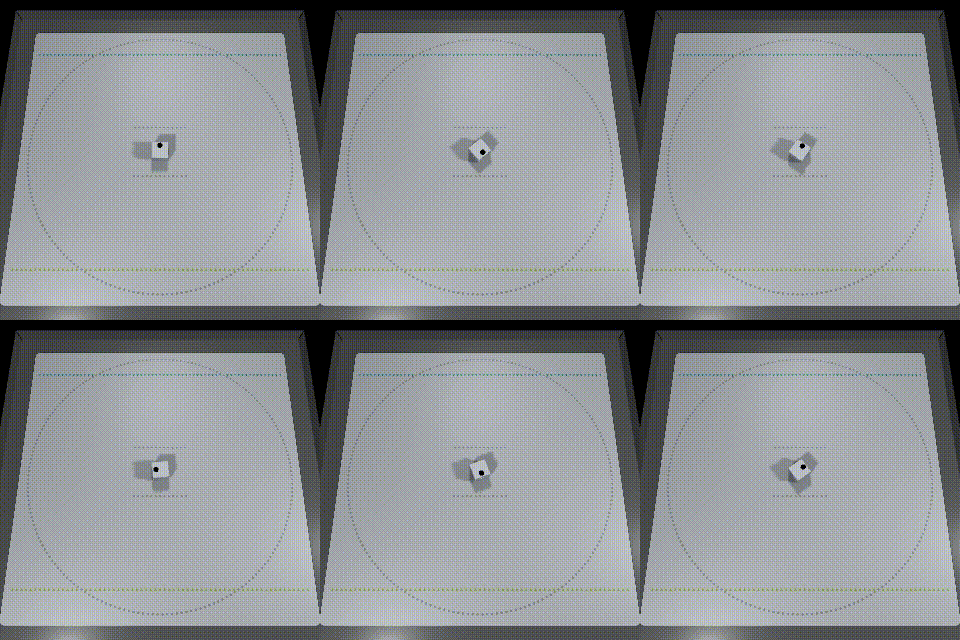
ステージの配置方法
以下の手順で基礎環境を構築する事が出来ます。
- 「ファイル > 新しいシーン」をクリックして、新しいシーンを作成します。
- ヒエラルキー上から「Main Camera」と「Directional Light」を削除
- プロジェクトウィンドウで「Assets/toio-sdk/Scripts/Simulator/Prefabs」フォルダを開きます。
- 「Cube」Prefabファイルと「Stage」Prefabファイルをヒエラルキーにドラック&ドロップします。
※「シーンビュー」に切り替えてマウス操作すれば「Cube」オブジェクトの移動も出来ます。
※マットを変更する場合はHierarchyウィンドウで「Stage→Mat」を選択し、Inspectorウィンドウの「Mat → Type」で利用するプレイマットを選択することができます。詳しい操作方法は【こちら】を参照してください。 - ヒエラルキー上で右クリック、右クリックメニューから「空のオブジェクトを作成」をクリックし、「scene」という名前にします(※名前は自由です)。
- 「scene」オブジェクトを選択し、インスペクター上から「コンポーネントを追加」をクリックします。
- 任意のスクリプト名(例 BasicScene)を入力して、スクリプトを作成します。
- 作成したスクリプトを下記サンプルコードに書き換えます。(クラス名はスクリプトファイルと同じ名前にする必要があります)
以上を完了させてエディタの再生ボタンを押すと、toio SDK for Unity ダウンロードの最後で再生したサンプルと同じように、キューブが回転し続けるはずです。
サンプルコード
using UnityEngine;
using toio;

// ファイル名とクラス名は一致させる必要があります
public class BasicScene : MonoBehaviour
{
    float intervalTime = 0.05f;
    float elapsedTime = 0;
    Cube cube;

    // 非同期初期化
    // C#標準機能であるasync/awaitキーワードを使用する事で、検索・接続それぞれで終了待ちする
    // async: 非同期キーワード
    // await: 待機キーワード
    async void Start()
    {
      	// Bluetoothデバイスを検索
        var peripheral = await new NearestScanner().Scan();
       	// デバイスへ接続してCube変数を生成
        cube = await new CubeConnecter().Connect(peripheral);
    }

    void Update()
    {
        // Cube変数の生成が完了するまで早期リターン
        if (null == cube) { return; }
        // 経過時間を計測
        elapsedTime += Time.deltaTime;

      	// 前回の命令から50ミリ秒以上経過した場合
        if (intervalTime < elapsedTime)
        {
            elapsedTime = 0.0f;
            // 左モーター速度:50, 右モーター速度:-50, 制御時間:200ミリ秒
            cube.Move(50, -50, 200);
        }
    }
}
3. 移動する
※ この章のサンプルファイルは、「Assets/toio-sdk/Tutorials/1.Basic/1.Move/」 にあります。
※ この章のウェブアプリサンプルは【コチラ】です。
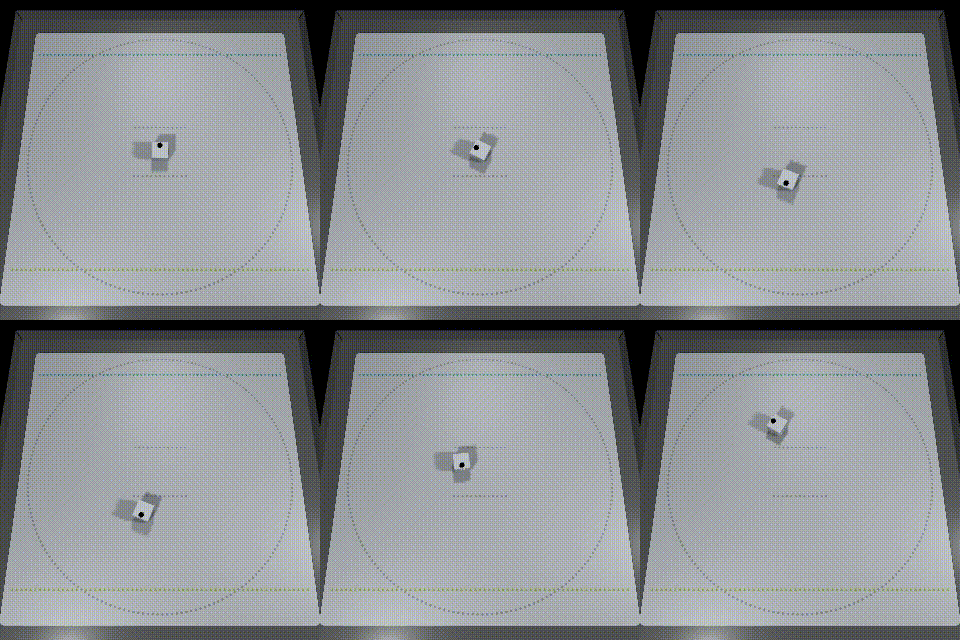
Cube クラスの Move メソッドでキューブのモーターを制御することが出来ます。
//--------------------------------------------------------
// 時間指定付きモーター制御
// https://toio.github.io/toio-spec/docs/ble_motor#時間指定付きモーター制御
//--------------------------------------------------------

// left       | 左モーター速度 | 範囲(0~100)
// right      | 右モーター速度 | 範囲(0~100)
// durationMs | 持続時間    | 範囲(0~2550)
// order      | 優先度     | 種類(Week, Strong)
cube.Move(int left, int right, int durationMs, ORDER_TYPE order=ORDER_TYPE.Weak);
実行コード
// ファイル名とクラス名は一致させる必要があります
public class MoveScene : MonoBehaviour
{
    float intervalTime = 2.0f;
    float elapsedTime = 0;
    Cube cube;
    bool started = false;
    int phase = 0;

    async void Start()
    {
        var peripheral = await new NearestScanner().Scan();
        cube = await new CubeConnecter().Connect(peripheral);
        started = true;
    }

    void Update()
    {
        if (!started) return;

        elapsedTime += Time.deltaTime;
        if (intervalTime < elapsedTime) // 2秒ごとに実行
        {
            if (phase == 0)
            {
                Debug.Log("---------- Phase 0 - 右回転 ----------");
                // 右回転:左モーター指令 50、右モーター指令 -50、継続時間 1500ms
                cube.Move(50, -50, 1500);
            }
            else if (phase == 1)
            {
                Debug.Log("---------- Phase 1 - 前進 ----------");
                // MoveRawで前進:左モーター指令 20、右モーター指令 20、継続時間 1500ms
                cube.Move(20, 20, 1500);
            }
            else if (phase == 3)
            {
                Debug.Log("---------- Phase 3 - 左回り ----------");
                // MoveRawで前進:左モーター指令 100、右モーター指令 70、継続時間 1000ms
                cube.Move(100, 70, 1800);
            }
            else if (phase == 4)
            {
                Debug.Log("---------- Phase 4 - 後進 ----------");
                // MoveRawで前進:左モーター指令 -100、右モーター指令 -100、継続時間 500
                cube.Move(-100, -100, 500);
            }
            else if (phase == 5)
            {
                Debug.Log("---------- Phase 5 - 左回転 ----------");
                // moveで前進:前進指令 -100、回転指令 100、(希望)継続時間 2000
                cube.Move(-100, 100, 2000);
            }
            else if (phase == 6)
            {
                Debug.Log("---------- 【リセット】 ----------");
                phase = -1;
            }

            elapsedTime = 0.0f;
            phase += 1;
        }
    }
}
4. 音を鳴らす
※ この章のサンプルファイルは、「Assets/toio-sdk/Tutorials/1.Basic/2.Sound/」 にあります。
※ この章のウェブアプリサンプルは【コチラ】です。
Cube クラスの PlayPresetSound メソッドでキューブからあらかじめ用意された効果音を再生出来ます。 用意されている効果音については【コチラ】を参照してください。
//--------------------------------------------------------
// 効果音の再生
// https://toio.github.io/toio-spec/docs/ble_sound#効果音の再生
//--------------------------------------------------------

// soundID | ID    | 範囲(0~10)
// volume  | 音量  | 範囲(0~255)
// order   | 優先度 | 種類(Week, Strong)
cube.PlayPresetSound(int soundId, int volume=255, ORDER_TYPE order=ORDER_TYPE.Strong);
任意の音を鳴らしたい場合は、 再生したい音を、音符に相当するCubeクラス内の SoundOperation 内部クラスの配列として定義し、それを Cube クラスの PlaySound メソッドで再生させます。
//--------------------------------------------------------
// MIDI note numberの再生
// https://toio.github.io/toio-spec/docs/ble_sound#midi-note-number-の再生
//--------------------------------------------------------

// durationMs  | 持続時間 | 範囲(10~2550)
// volume      | 音量   | 範囲(0~255)
// note_number | 音符   | 範囲(0~128)
new Cube.SoundOperation(int durationMs=0, byte volume=0, byte note_number=0);

// repeatCount | 繰り返し回数 | 範囲(0~255)
// operations  | 命令配列   | 個数(1~59)
// order       | 優先度    | 種類(Week, Strong)
cube.PlaySound(int repeatCount, SoundOperation[] operations, ORDER_TYPE order=ORDER_TYPE.Strong);
※ Unity でシミューレータ実行すると音が鳴ります。
実行コード
// ファイル名とクラス名は一致させる必要があります
public class SoundScene : MonoBehaviour
{
    float intervalTime = 6.0f;
    float elapsedTime = 0;
    Cube cube;
    bool started = false;

    // Start is called before the first frame update
    async void Start()
    {
        var peripheral = await new NearestScanner().Scan();
        cube = await new CubeConnecter().Connect(peripheral);
        // 最初にプリセットの音源を再生
        cube.PlayPresetSound(0);
        started = true;
    }

    // Update is called once per frame
    void Update()
    {
        if (!started) return;

        elapsedTime += Time.deltaTime;
        if (intervalTime < elapsedTime) // 6秒ごとに実行
        {
            elapsedTime = 0.0f;

            // カエルの歌の楽譜を作成
            List<Cube.SoundOperation> sound = new List<Cube.SoundOperation>();
            // 継続時間(ミリ秒), 音量(0~100), 音符(0~128)
            sound.Add(new Cube.SoundOperation(durationMs:300, volume:15, note_number:Cube.NOTE_NUMBER.C6));
            sound.Add(new Cube.SoundOperation(durationMs:300, volume:15, note_number:Cube.NOTE_NUMBER.NO_SOUND));
            sound.Add(new Cube.SoundOperation(durationMs:300, volume:15, note_number:Cube.NOTE_NUMBER.C6));
            sound.Add(new Cube.SoundOperation(durationMs:300, volume:15, note_number:Cube.NOTE_NUMBER.NO_SOUND));
            sound.Add(new Cube.SoundOperation(durationMs:300, volume:15, note_number:Cube.NOTE_NUMBER.C6));
            sound.Add(new Cube.SoundOperation(durationMs:300, volume:15, note_number:Cube.NOTE_NUMBER.NO_SOUND));
            sound.Add(new Cube.SoundOperation(durationMs:300, volume:15, note_number:Cube.NOTE_NUMBER.C6));
            sound.Add(new Cube.SoundOperation(durationMs:300, volume:15, note_number:Cube.NOTE_NUMBER.NO_SOUND));
            sound.Add(new Cube.SoundOperation(durationMs:300, volume:15, note_number:Cube.NOTE_NUMBER.C6));
            sound.Add(new Cube.SoundOperation(durationMs:300, volume:15, note_number:Cube.NOTE_NUMBER.D6));
            sound.Add(new Cube.SoundOperation(durationMs:300, volume:15, note_number:Cube.NOTE_NUMBER.E6));
            sound.Add(new Cube.SoundOperation(durationMs:300, volume:15, note_number:Cube.NOTE_NUMBER.F6));
            sound.Add(new Cube.SoundOperation(durationMs:300, volume:15, note_number:Cube.NOTE_NUMBER.E6));
            sound.Add(new Cube.SoundOperation(durationMs:300, volume:15, note_number:Cube.NOTE_NUMBER.D6));
            sound.Add(new Cube.SoundOperation(durationMs:300, volume:15, note_number:Cube.NOTE_NUMBER.C6));
            // 楽譜を再生
            cube.PlaySound(1, sound.ToArray());
        }
    }
}
5. LED を発光する
※ この章のサンプルファイルは、「Assets/toio-sdk/Tutorials/1.Basic/3.LED/」 にあります。
※ この章のウェブアプリサンプルは【コチラ】です。
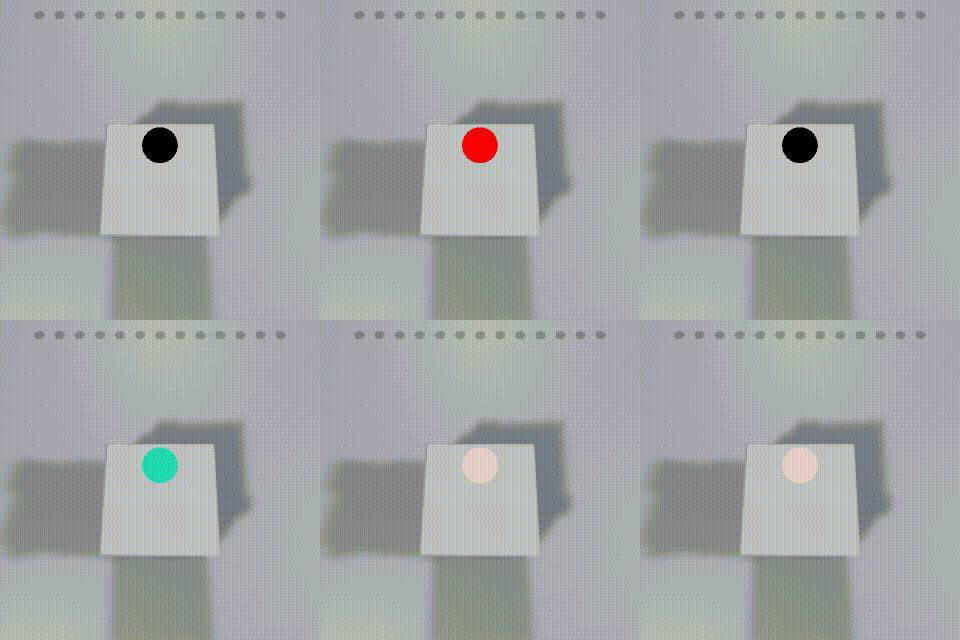
Cube クラスの TurnLedOn メソッドでキューブ底面についている LED を制御することが出来ます。
//--------------------------------------------------------
// 点灯・消灯
// https://toio.github.io/toio-spec/docs/ble_light#点灯消灯
//--------------------------------------------------------

// red   | 色の強さ | 範囲(0~255)
// green | 色の強さ | 範囲(0~255)
// blue  | 色の強さ | 範囲(0~255)
// durationMs | 持続時間 | 範囲(10~2550)
// order | 優先度  | 種類(Week, Strong)
cube.TurnLedOn(int red, int green, int blue, int durationMs, ORDER_TYPE order=ORDER_TYPE.Strong);
//--------------------------------------------------------
// 連続的な点灯・消灯
// https://toio.github.io/toio-spec/docs/ble_light#連続的な点灯消灯
//--------------------------------------------------------

// durationMs | 持続時間 | 範囲(10~2550)
// red        | 色の強さ | 範囲(0~255)
// green      | 色の強さ | 範囲(0~255)
// blue       | 色の強さ | 範囲(0~255)
new Cube.LightOperation(int durationMs = 0, byte red = 0, byte green = 0, byte blue = 0);

// repeatCount | 繰り返し回数 | 範囲(0~255)
// operations  | 命令配列   | 個数(1~59)
// order       | 優先度    | 種類(Week, Strong)
cube.TurnOnLightWithScenario(int repeatCount, Cube.LightOperation[] operations, ORDER_TYPE order=ORDER_TYPE.Strong)
実行コード
// ファイル名とクラス名は一致させる必要があります
public class LEDScene : MonoBehaviour
{
    float intervalTime = 5.0f;
    float elapsedTime = 0;
    Cube cube;
    bool started = false;

    // Start is called before the first frame update
    async void Start()
    {
        var peripheral = await new NearestScanner().Scan();
        cube = await new CubeConnecter().Connect(peripheral);
        // 最初に単発発光命令
        cube.TurnLedOn(255, 0, 0, 2000);
        started = true;
    }

    // Update is called once per frame
    void Update()
    {
        if (!started) return;

        elapsedTime += Time.deltaTime;

        if (intervalTime < elapsedTime) // 5秒ごとに実行
        {
            elapsedTime = 0.0f;
            // 発光シナリオ
            List<Cube.LightOperation> scenario = new List<Cube.LightOperation>();
            float rad = (Mathf.Deg2Rad * (360.0f / 29.0f));
            for (int i = 0; i < 29; i++)
            {
                byte r = (byte)Mathf.Clamp((128 + (Mathf.Cos(rad * i) * 128)), 0, 255);
                byte g = (byte)Mathf.Clamp((128 + (Mathf.Sin(rad * i) * 128)), 0, 255);
                byte b = (byte)Mathf.Clamp(((Mathf.Abs(Mathf.Cos(rad * i) * 255))), 0, 255);
                scenario.Add(new Cube.LightOperation(100, r, g, b));
            }
            cube.TurnOnLightWithScenario(3, scenario.ToArray());
        }
    }
}
6. toio IDの読み取り(Position ID & Standard ID)
※ この章のサンプルファイルは、「Assets/toio-sdk/Tutorials/1.Basic/4.toioID/」 にあります。
※ この章のウェブアプリサンプルは【コチラ】です。
toio ID について詳細はtoio™コア キューブ技術仕様 を参照してください。
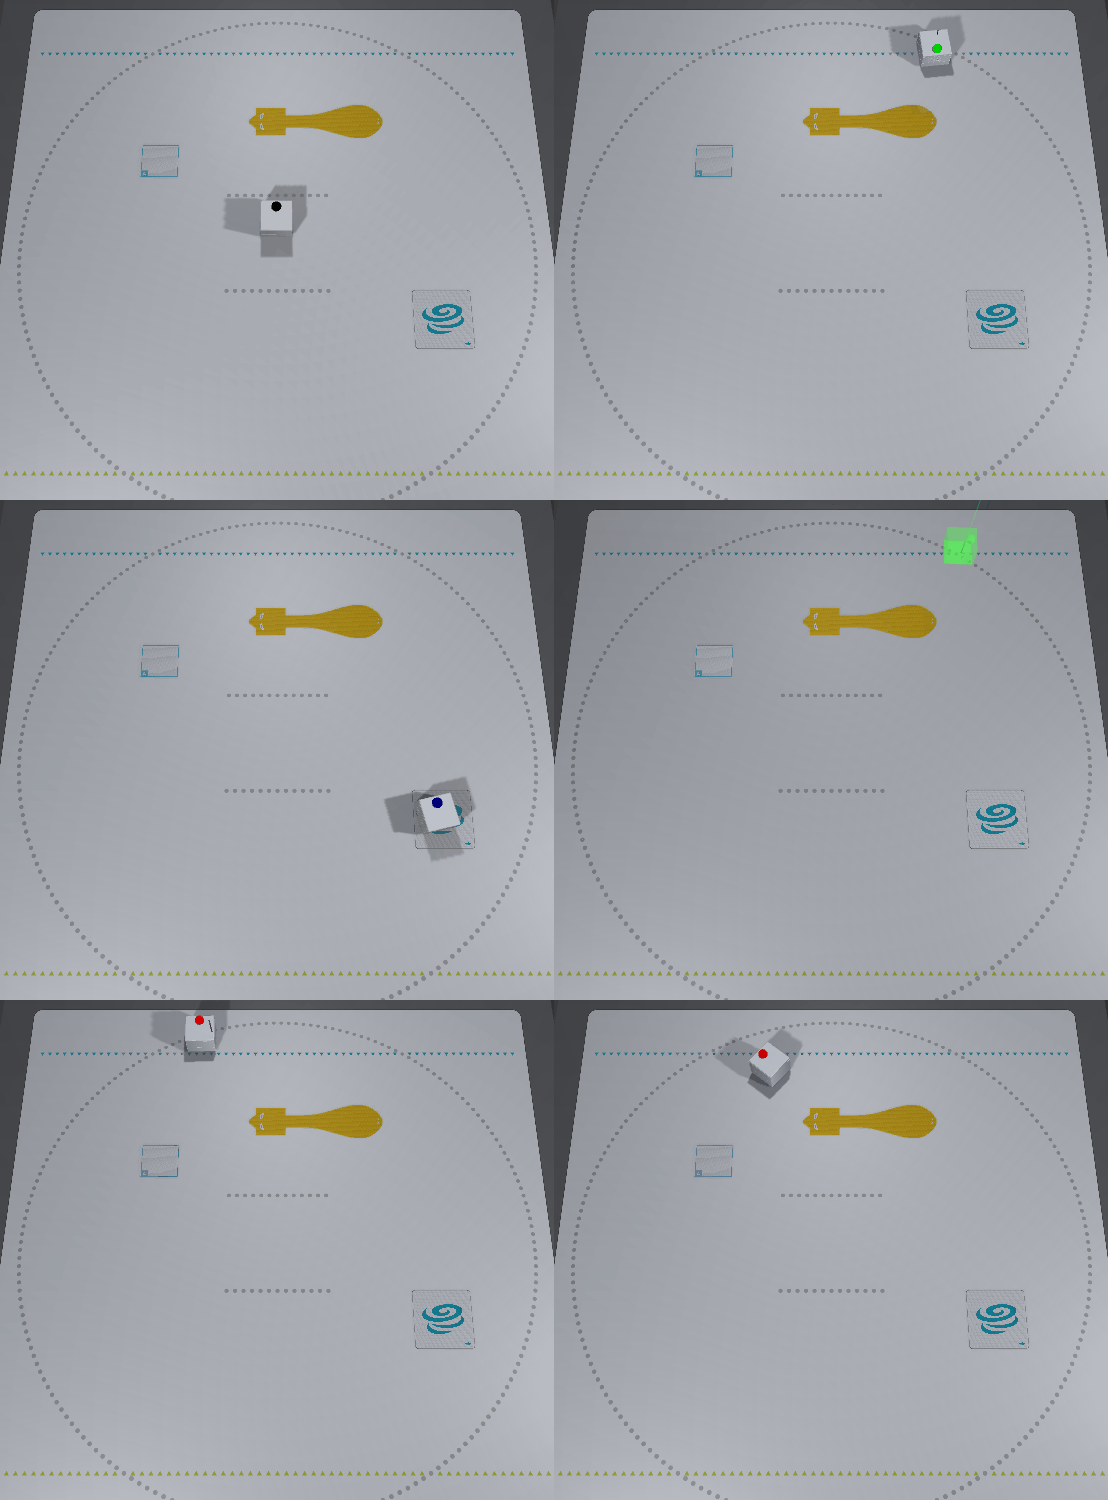
上図では、Cube オブジェクトを違う Standard ID に置くことで、LED の色を切り替えて、マット上の y 座標(縦方向)で発光の強度を設定しています。
toio ID は、Cube クラスのメンバー変数として、直接読み取ることができます。
public int x { get; }   // Position ID の x 座標
public int y { get; }   // Position ID の y 座標
public Vector2 pos { get; } // 2Dベクトルに変換済みの Position ID
public uint standardId { get; protected set; } // Standard ID
※ 他にも直接読み取れる情報がありますので、ドキュメントのCubeクラスAPIを参照してください。
実行コード
public class toioIDScene : MonoBehaviour
{
    float intervalTime = 0.1f;
    float elapsedTime = 0;
    Cube cube;
    bool started = false;

    async void Start()
    {
        var peripheral = await new NearestScanner().Scan();
        cube = await new CubeConnecter().Connect(peripheral);
        started = true;
    }

    void Update()
    {
        if (!started) return;

        elapsedTime += Time.deltaTime;

        if (intervalTime < elapsedTime) // 0.1秒ごとに実行
        {
            elapsedTime = 0.0f;

            // 手法A: y 座標で発光の強度を決める
            var strength = (510 - cube.y)/2;
            // 手法B: x 座標で発光の強度を決める
            // var strength = (510 - cube.x)/2;
            // 手法C: pos と中央の距離で発光の強度を決める
            // var strength = (int)(255 - (cube.pos-new Vector2(255,255)).magnitude);

            // Standard ID によって発光の色を決める (初期値は0)
            if (cube.standardId == 3670337) // Simple Card "A"
                cube.TurnLedOn(strength, 0, 0, 0);
            else if (cube.standardId == 3670080) // toio collection skunk yellow
                cube.TurnLedOn(0, strength, 0, 0);
            else if (cube.standardId == 3670016) // toio collection card typhoon
                cube.TurnLedOn(0, 0, strength, 0);
            else cube.TurnLedOff();
        }
    }
}
7. センサーのイベントを検知
※ この章のサンプルファイルは、「Assets/toio-sdk/Tutorials/1.Basic/5.Event/」 にあります。
※ この章のウェブアプリサンプルは【コチラ】です。
以下のコールバックで、キューブに変化が起きた(イベントを検知した)時の処理を記述することが出来ます。 各イベントについては toio™コア キューブ技術仕様に準拠していますので、詳しくはそちらを参照してください。
- ボタンイベント: https://toio.github.io/toio-spec/docs/ble_button
- 傾き、衝突、ダブルタップ、姿勢、シェイクイベント: https://toio.github.io/toio-spec/docs/ble_sensor
- 座標角度、Standard ID イベント: https://toio.github.io/toio-spec/docs/ble_id
- このイベントを検知するには、マットや Standard ID 上でキューブを動かす必要があります。
- モーター速度検出イベント:https://toio.github.io/toio-spec/docs/ble_motor
- 磁気センサーイベント:https://toio.github.io/toio-spec/docs/ble_magnetic_sensor
// ボタンイベント
// https://toio.github.io/toio-spec/docs/ble_button
cube.buttonCallback.AddListener("EventScene", OnPressButton);
// 傾きイベント
// https://toio.github.io/toio-spec/docs/ble_sensor#水平検出
cube.slopeCallback.AddListener("EventScene", OnSlope);
// 衝突イベント
// https://toio.github.io/toio-spec/docs/ble_sensor#衝突検出
cube.collisionCallback.AddListener("EventScene", OnCollision);
// 座標角度イベント
// https://toio.github.io/toio-spec/docs/ble_id#position-id
cube.idCallback.AddListener("EventScene", OnUpdateID);        // 更新
cube.idMissedCallback.AddListener("EventScene", OnMissedID);  // ロスト
// Standard IDイベント
// https://toio.github.io/toio-spec/docs/ble_id#standard-id
cube.standardIdCallback.AddListener("EventScene", OnUpdateStandardID);       // 更新
cube.standardIdMissedCallback.AddListener("EventScene", OnMissedStandardID); // ロスト
// 姿勢イベント
// https://toio.github.io/toio-spec/docs/ble_sensor#姿勢検出
cube.poseCallback.AddListener("EventScene", OnPose);
// ダブルタップイベント
// https://toio.github.io/toio-spec/docs/ble_sensor#ダブルタップ検出
cube.doubleTapCallback.AddListener("EventScene", OnDoubleTap);
// シェイクイベント
// https://toio.github.io/toio-spec/docs/ble_sensor#シェイク検出
cube.shakeCallback.AddListener("EventScene", OnShake);
// モーター速度イベント
// https://toio.github.io/toio-spec/docs/ble_motor#モーターの速度情報の取得
cube.motorSpeedCallback.AddListener("EventScene", OnMotorSpeed);
// 磁石状態イベント
// https://toio.github.io/toio-spec/docs/ble_magnetic_sensor#磁石の状態
cube.magnetStateCallback.AddListener("EventScene", OnMagnetState);
// 磁力イベント
// https://toio.github.io/toio-spec/docs/ble_magnetic_sensor#磁力の検出-
cube.magneticForceCallback.AddListener("EventScene", OnMagneticForce);
// 姿勢角イベント
// https://toio.github.io/toio-spec/docs/ble_high_precision_tilt_sensor
cube.attitudeCallback.AddListener("EventScene", OnAttitude);
実行コード
// ファイル名とクラス名は一致させる必要があります
public class EventScene : MonoBehaviour
{
    float intervalTime = 0.05f;
    float elapsedTime = 0;
    Cube cube;
    bool showId = false;

    async void Start()
    {
        var peripheral = await new NearestScanner().Scan();
        cube = await new CubeConnecter().Connect(peripheral);
        // コールバック登録
        cube.buttonCallback.AddListener("EventScene", OnPressButton);
        cube.slopeCallback.AddListener("EventScene", OnSlope);
        cube.collisionCallback.AddListener("EventScene", OnCollision);
        cube.idCallback.AddListener("EventScene", OnUpdateID);
        cube.standardIdCallback.AddListener("EventScene", OnUpdateStandardID);
        cube.idMissedCallback.AddListener("EventScene", OnMissedID);
        cube.standardIdMissedCallback.AddListener("EventScene", OnMissedStandardID);
        cube.poseCallback.AddListener("EventScene", OnPose);
        cube.doubleTapCallback.AddListener("EventScene", OnDoubleTap);
        cube.shakeCallback.AddListener("EventScene", OnShake);
        cube.motorSpeedCallback.AddListener("EventScene", OnMotorSpeed);
        cube.magnetStateCallback.AddListener("EventScene", OnMagnetState);
        cube.magneticForceCallback.AddListener("EventScene", OnMagneticForce);
        cube.attitudeCallback.AddListener("EventScene", OnAttitude);

        // デフォルト状態がオフのセンサーを有効化
        await cube.ConfigMotorRead(true);
        await cube.ConfigAttitudeSensor(Cube.AttitudeFormat.Eulers, 100, Cube.AttitudeNotificationType.OnChanged);
        await cube.ConfigMagneticSensor(Cube.MagneticMode.MagnetState);
    }

    void OnCollision(Cube c)
    {
        cube.PlayPresetSound(2);
    }

    void OnSlope(Cube c)
    {
        cube.PlayPresetSound(1);
    }

    void OnPressButton(Cube c)
    {
        if (c.isPressed)
        {
            showId = !showId;
        }
        cube.PlayPresetSound(0);
    }

    void OnUpdateID(Cube c)
    {
        if (showId)
        {
            Debug.LogFormat("pos=(x:{0}, y:{1}), angle={2}", c.pos.x, c.pos.y, c.angle);
        }
    }

    void OnUpdateStandardID(Cube c)
    {
        if (showId)
        {
            Debug.LogFormat("standardId:{0}, angle={1}", c.standardId, c.angle);
        }
    }

    void OnMissedID(Cube cube)
    {
        Debug.LogFormat("Postion ID Missed.");
    }

    void OnMissedStandardID(Cube c)
    {
        Debug.LogFormat("Standard ID Missed.");
    }

    void OnPose(Cube c)
    {
        Debug.Log($"pose = {c.pose.ToString()}");
    }

    void OnDoubleTap(Cube c)
    {
        c.PlayPresetSound(3);
    }

    void OnShake(Cube c)
    {
        if (c.shakeLevel > 5)
            c.PlayPresetSound(4);
    }

    void OnMotorSpeed(Cube c)
    {
        Debug.Log($"motor speed: left={c.leftSpeed}, right={c.rightSpeed}");
    }

    void OnMagnetState(Cube c)
    {
        Debug.Log($"magnet state: {c.magnetState.ToString()}");
    }

    void OnMagneticForce(Cube c)
    {
        Debug.Log($"magnetic force = {c.magneticForce}");
    }

    void OnAttitude(Cube c)
    {
        Debug.Log($"attitude = {c.eulers}");
    }
}
8. 複数のキューブを動かす
※ この章のサンプルファイルは、「Assets/toio-sdk/Tutorials/1.Basic/6.MultiCube/」 にあります。
※ この章のウェブアプリサンプルは【コチラ】です。
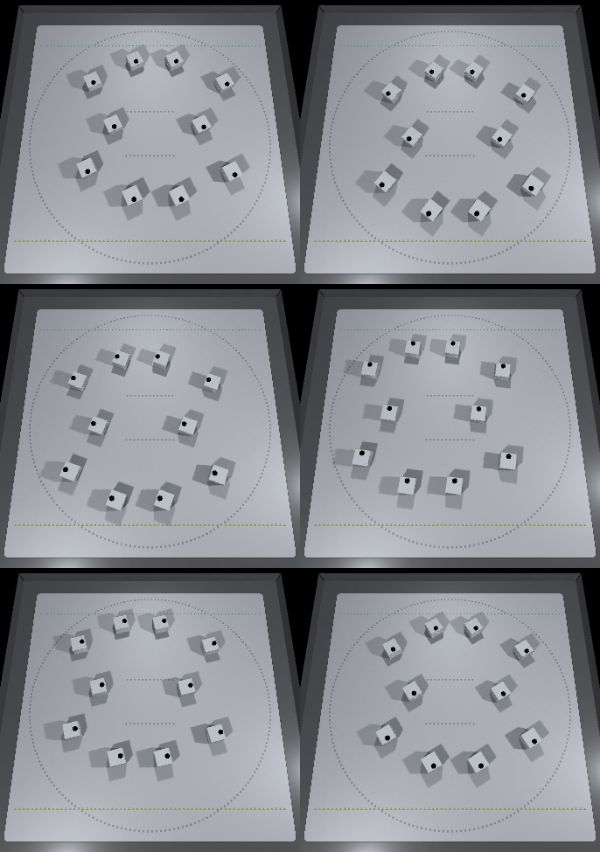
これまでのサンプルコードでは 1 台のキューブに接続していました。
スキャン部分を以下のコードに変更すると、複数台のキューブに接続が可能になります。
// 最大12台のキューブを検索
var peripherals = await new NearScanner(12).Scan();
// 検索したキューブに接続
cubes = await new CubeConnecter().Connect(peripherals);
実行コード
// ファイル名とクラス名は一致させる必要があります
public class MultiCubeScene : MonoBehaviour
{
    float intervalTime = 0.05f;
    float elapsedTime = 0;
    Cube[] cubes;
    bool started = false;

    async void Start()
    {
        var peripherals = await new NearScanner(12).Scan();
        cubes = await new CubeConnecter().Connect(peripherals);
        started = true;
    }

    void Update()
    {
        if (!started) { return; }

        elapsedTime += Time.deltaTime;
        if (intervalTime < elapsedTime)
        {
            elapsedTime = 0.0f;
            foreach(var cube in cubes)
            {
                cube.Move(60, 20, 200);
            }
        }
    }
}
9. CubeManagerクラスを用いたソースコードの簡略化
※ この章のサンプルファイルは、「Assets/toio-sdk/Tutorials/1.Basic/7.CubeManager/」 にあります。
これまでのサンプルでは
- Scan と Connect
- cube 変数
- started という初期化完了フラグ
- 時間制御変数
などを用意していました。
しかし、toio™ のプログラムを作る度に毎回似たようなコードを書く必要があります。
CubeManager クラスを使うと、これらの定型的な処理を簡略化する事が出来ます。
一台接続
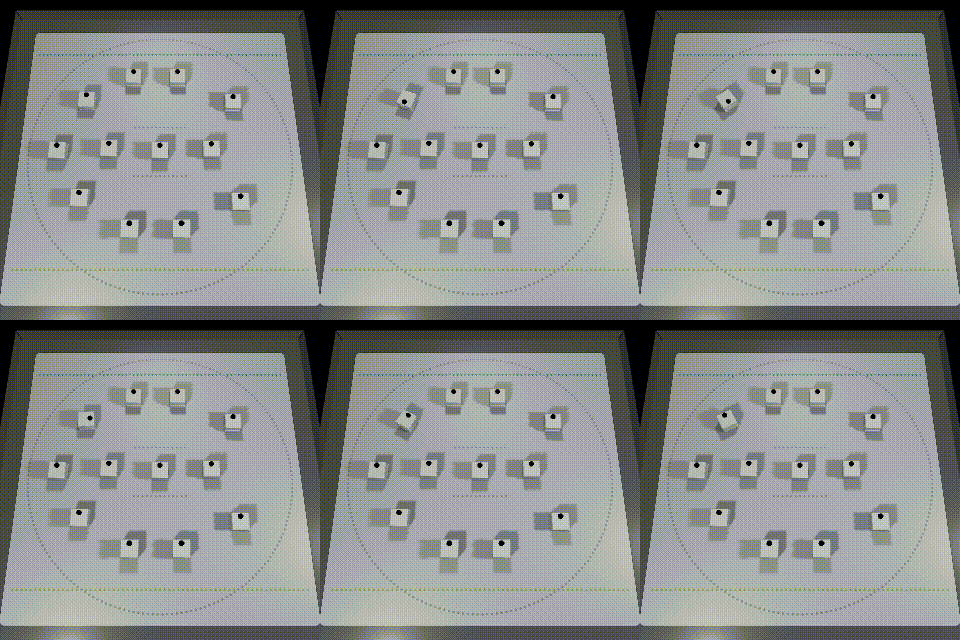
簡略前
public class CubeManagerScene_RawSingle : MonoBehaviour
{
    float intervalTime = 0.05f;
    float elapsedTime = 0;
    Cube cube;

    async void Start()
    {
        // モジュールを直接利用した場合:
        var peripheral = await new NearestScanner().Scan();
        cube = await new CubeConnecter().Connect(peripheral);
    }

    void Update()
    {
        // モジュールを直接利用した場合:
        if (null == cube) { return; }
        elapsedTime += Time.deltaTime;
        if (intervalTime < elapsedTime)
        {
            elapsedTime = 0.0f;
            cube.Move(50, -50, 200);
        }
    }
}
簡略後
public class CubeManagerScene_Single : MonoBehaviour
{
    CubeManager cubeManager;
    Cube cube;

    async void Start()
    {
        // CubeManagerからモジュールを間接利用した場合:
        cubeManager = new CubeManager();
        cube = await cubeManager.SingleConnect();
    }

    void Update()
    {
        // CubeManagerからモジュールを間接利用した場合:
        if (cubeManager.IsControllable(cube))
        {
            cube.Move(50, -50, 200);
        }
    }
}
複数台接続
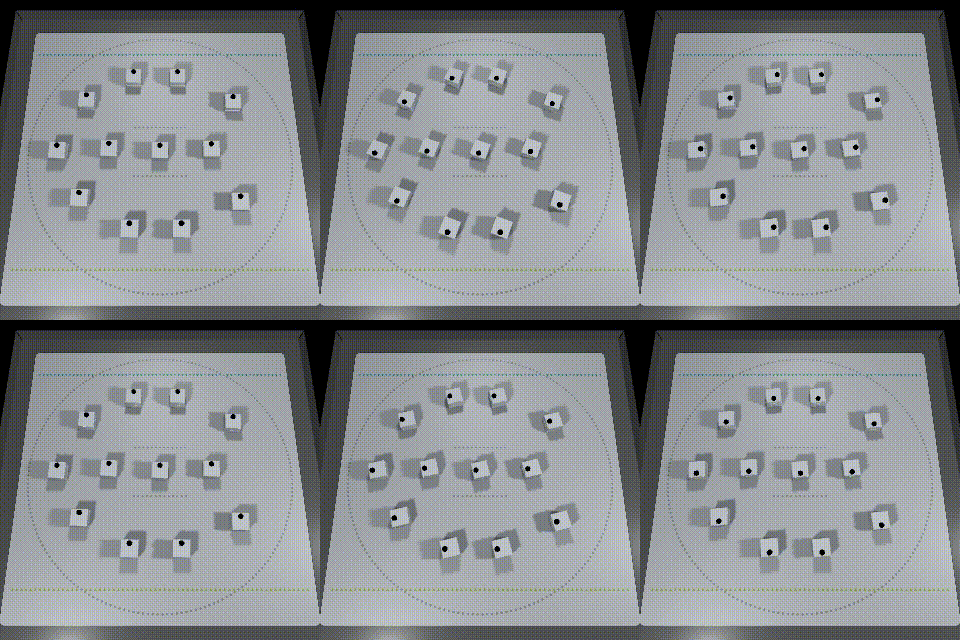
簡略前
public class CubeManagerScene_RawMulti : MonoBehaviour
{
    float intervalTime = 0.05f;
    float elapsedTime = 0;
    Cube[] cubes;
    bool started = false;

    async void Start()
    {
        // モジュールを直接利用した場合:
        var peripherals = await new NearScanner(12).Scan();
        cubes = await new CubeConnecter().Connect(peripherals);
        started = true;
    }

    void Update()
    {
        // モジュールを直接利用した場合:
        if (!started) { return; }
        elapsedTime += Time.deltaTime;
        if (intervalTime < elapsedTime)
        {
            elapsedTime = 0.0f;
            foreach(var cube in cubes)
            {
                cube.Move(50, -50, 200);
            }
        }
    }
}
簡略後
public class CubeManagerScene_Multi : MonoBehaviour
{
    CubeManager cubeManager;

    async void Start()
    {
        // CubeManagerからモジュールを間接利用した場合:
        cubeManager = new CubeManager();
        await cubeManager.MultiConnect(12);
    }

    void Update()
    {
        // CubeManagerからモジュールを間接利用した場合:
        foreach(var cube in cubeManager.cubes)
        {
            if (cubeManager.IsControllable(cube))
            {
                cube.Move(50, -50, 200);
            }
        }
    }
}
切断と再接続を繰り返し
簡略前
public class CubeManagerScene_RawReconnect : MonoBehaviour
{
    float intervalTime = 0.05f;
    float elapsedTime = 0;
    Cube cube;
    CubeConnecter connecter;

    async void Start()
    {
        // モジュールを直接利用した場合:
        var peripheral = await new NearestScanner().Scan();
        connecter = new CubeConnecter();
        cube = await connecter.Connect(peripheral);

        // 切断・再接続のループを開始
        if (cube != null) StartCoroutine(LoopConnection());
    }

    IEnumerator LoopConnection()
    {
        yield return new WaitForSeconds(3);

        // 切断 (モジュールを直接利用した場合)
        connecter.Disconnect(cube);
        yield return new WaitUntil(() => !cube.isConnected);
        yield return new WaitForSeconds(3);

        // 再接続 (モジュールを直接利用した場合)
        connecter.ReConnect(cube);
        yield return new WaitUntil(() => cube.isConnected);

        StartCoroutine(LoopConnection());
    }

    void Update()
    {
        // 回転(モジュールを直接利用した場合)
        if (null == cube) { return; }
        elapsedTime += Time.deltaTime;
        if (intervalTime < elapsedTime)
        {
            elapsedTime = 0.0f;
            cube.Move(50, -50, 200);
        }
    }
}
簡略後
public class CubeManagerScene_Reconnect : MonoBehaviour
{
    CubeManager cubeManager;
    Cube cube;

    async void Start()
    {
        // CubeManagerからモジュールを間接利用した場合:
        cubeManager = new CubeManager();
        cube = await cubeManager.SingleConnect();

        // 切断・再接続のループを開始
        if (cube != null) StartCoroutine(LoopConnection());
    }

    IEnumerator LoopConnection()
    {
        yield return new WaitForSeconds(3);

        // 切断 (CubeManager 利用した場合)
        cubeManager.DisconnectAll();    // ALT: cubeManager.Disconnect(cube);
        yield return new WaitUntil(() => !cube.isConnected);
        yield return new WaitForSeconds(3);

        // 再接続 (CubeManager 利用した場合)
        cubeManager.ReConnectAll();     // ALT: cubeManager.ReConnect(cube);
        yield return new WaitUntil(() => cube.isConnected);

        StartCoroutine(LoopConnection());
    }

    void Update()
    {
        // CubeManagerからモジュールを間接利用した場合:
        if (cubeManager.IsControllable(cube))
        {
            cube.Move(50, -50, 200);
        }
    }
}
10. 途中接続 / 途中切断
※ この章のサンプルファイルは、「Assets/toio-sdk/Tutorials/1.Basic/7.CubeManager/」 にあります。
NearScanner クラスの ScanAsync メソッドを呼ぶ事で、非同期検索が出来るようになります。
nearScanner.ScanAsync(coroutineObject, callback, autoRunning);
NearScanner クラスを直接利用した場合様々な処理を追加する必要がありますが、
CubeManager クラス内部で必要な処理を実行する事により、
分かりやすい形で非同期に接続/切断を実装する事が出来ます。
public class CubeManagerScene_MultiAsync : MonoBehaviour
{
    CubeManager cubeManager;

    async void Start()
    {
        cubeManager = new CubeManager();
        // 任意のタイミングで非同期接続
        cubeManager.MultiConnectAsync(
            cubeNum:4,
            coroutineObject:this,
            connectedAction:OnConnected
        );
    }

    void Update()
    {
        foreach (var cube in cubeManager.cubes)
        {
            if (cubeManager.IsControllable(cube))
            {
                cube.Move(50, -50, 200);
            }
        }
    }

    void OnConnected(Cube cube, CONNECTION_STATUS status)
    {
        if (status.IsNewConnected)
        {
            Debug.Log("new-connected!!");
        }
        else if (status.IsReConnected)
        {
            Debug.Log("re-connected!!");
        }
    }
}